Integrate Vemetric using Google Tag Manager
Easily integrate Vemetric using Google Tag Manager.
Google Tag Manager is a popular tool for managing and deploying other scripts into you website.
Below you can find a step by step guide on how to integrate Vemetric using Google Tag Manager.
Installation
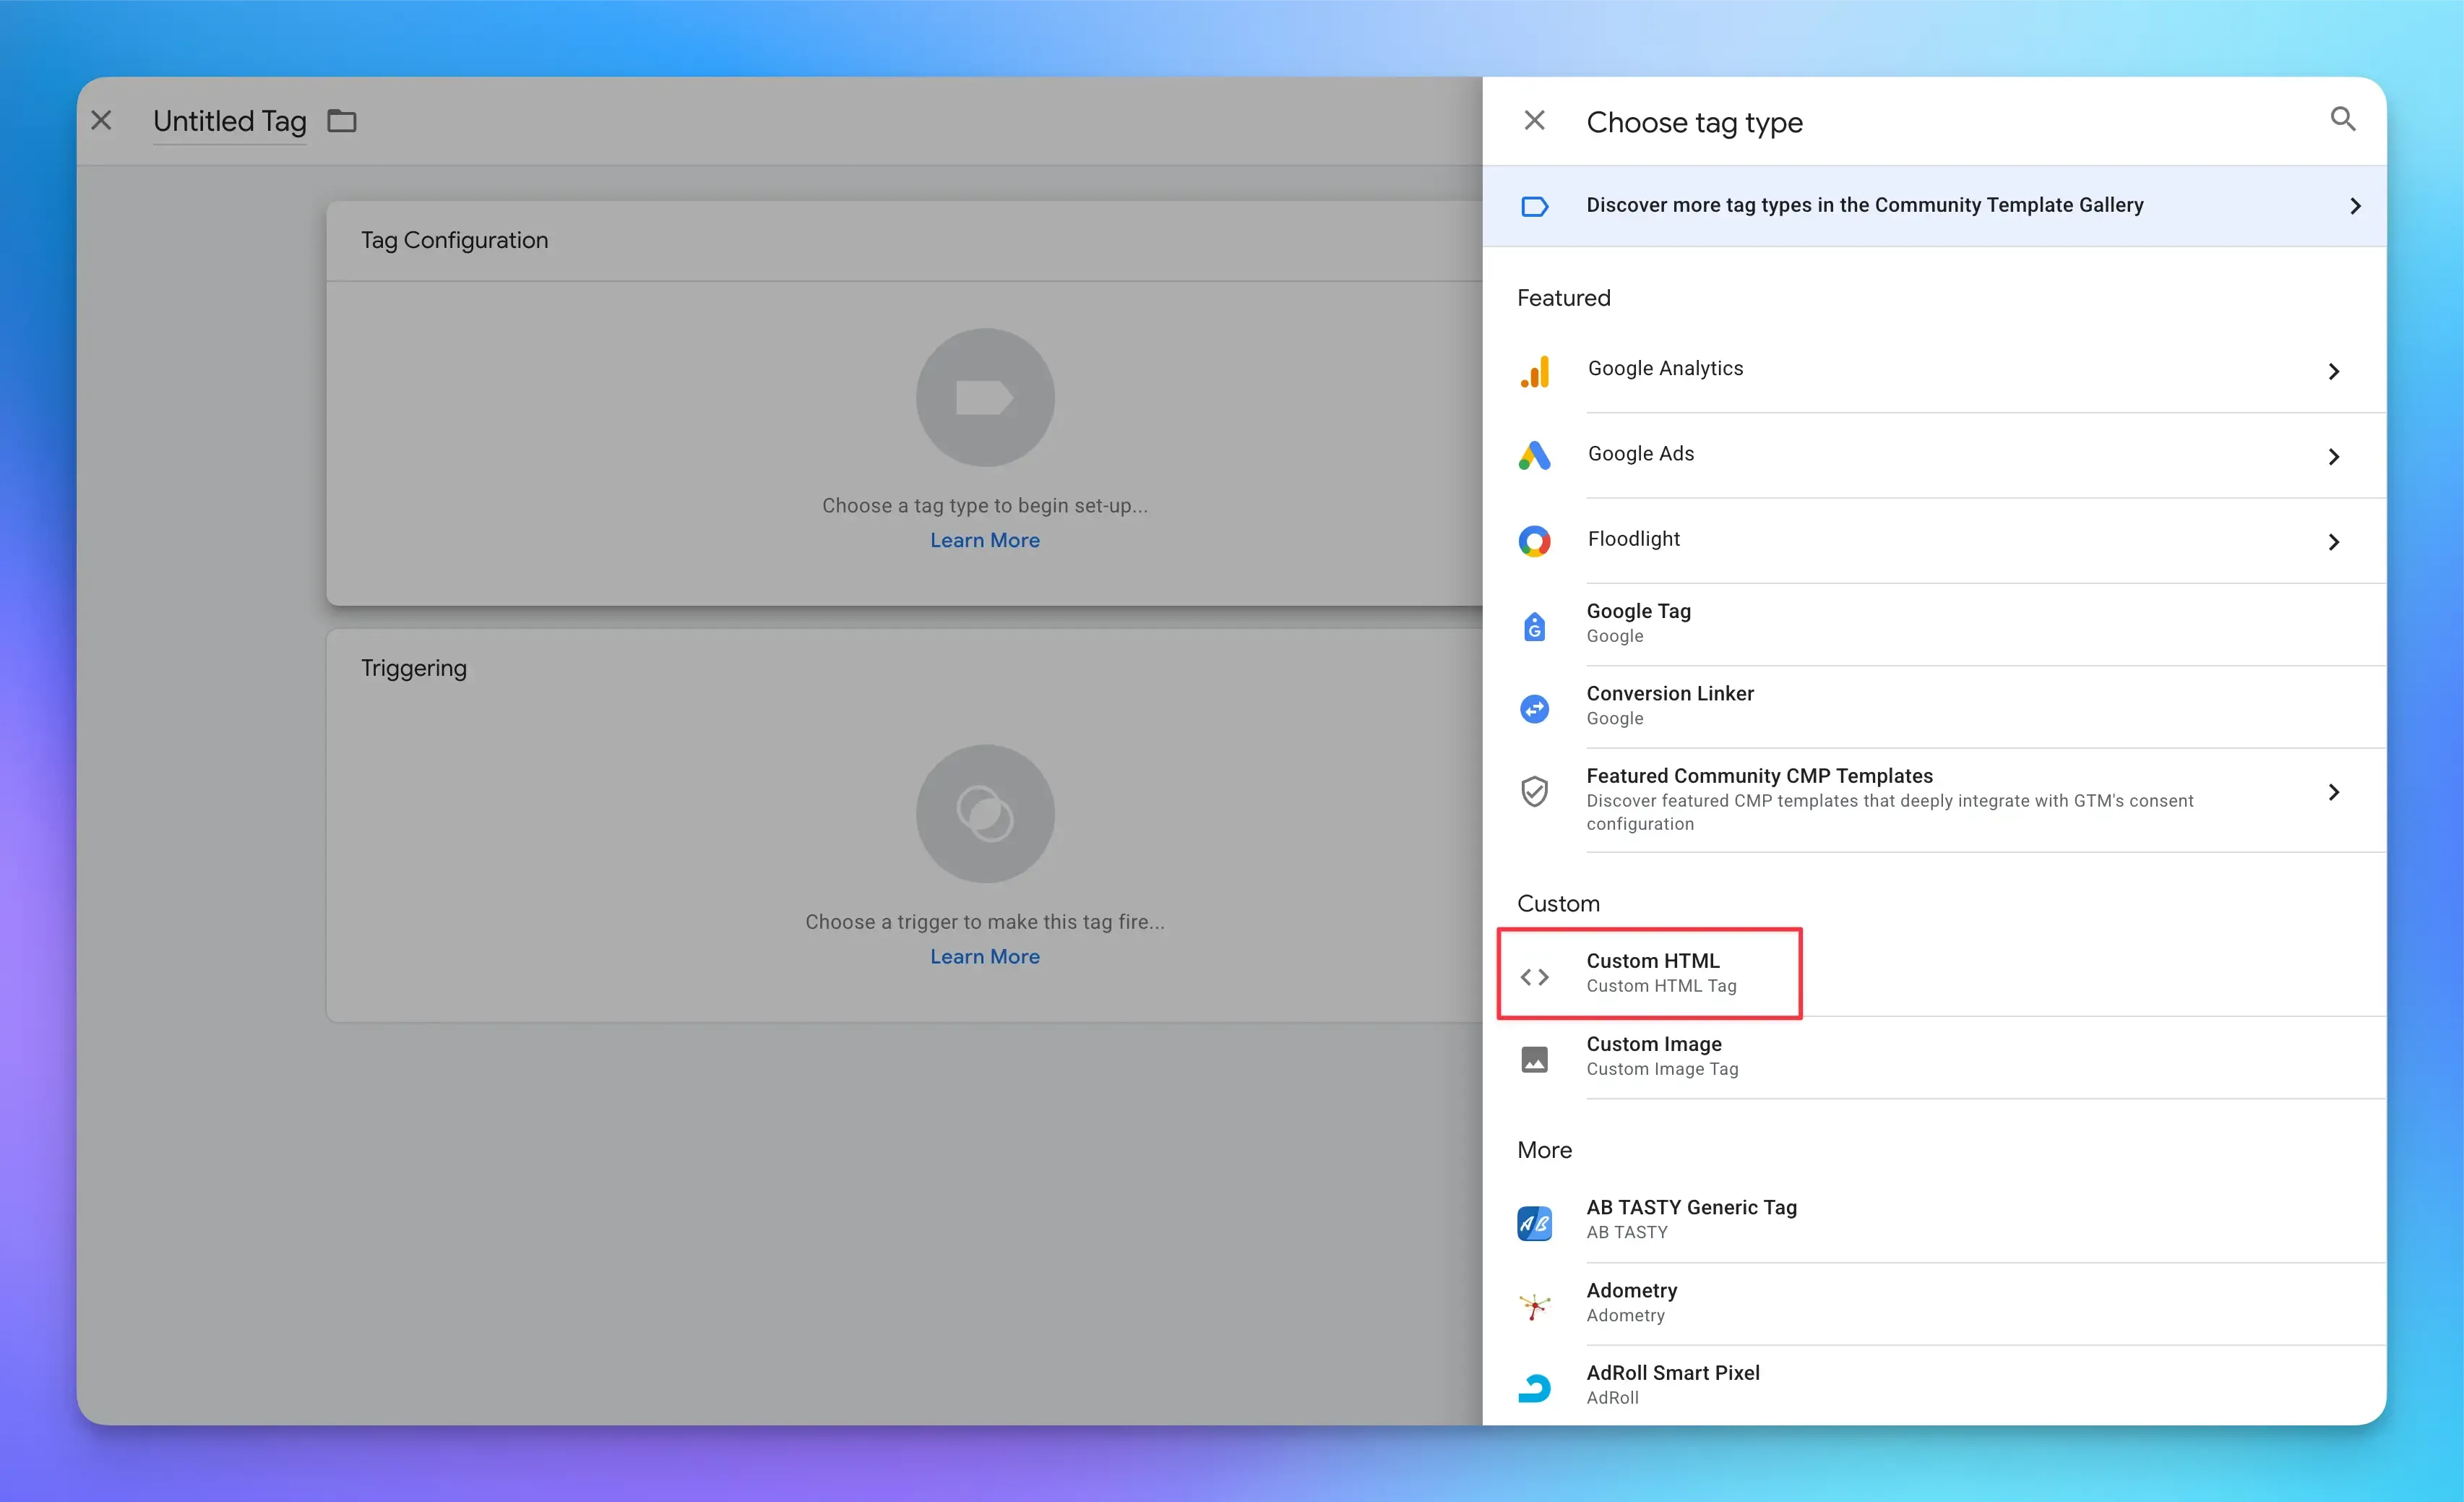
Create a new tag
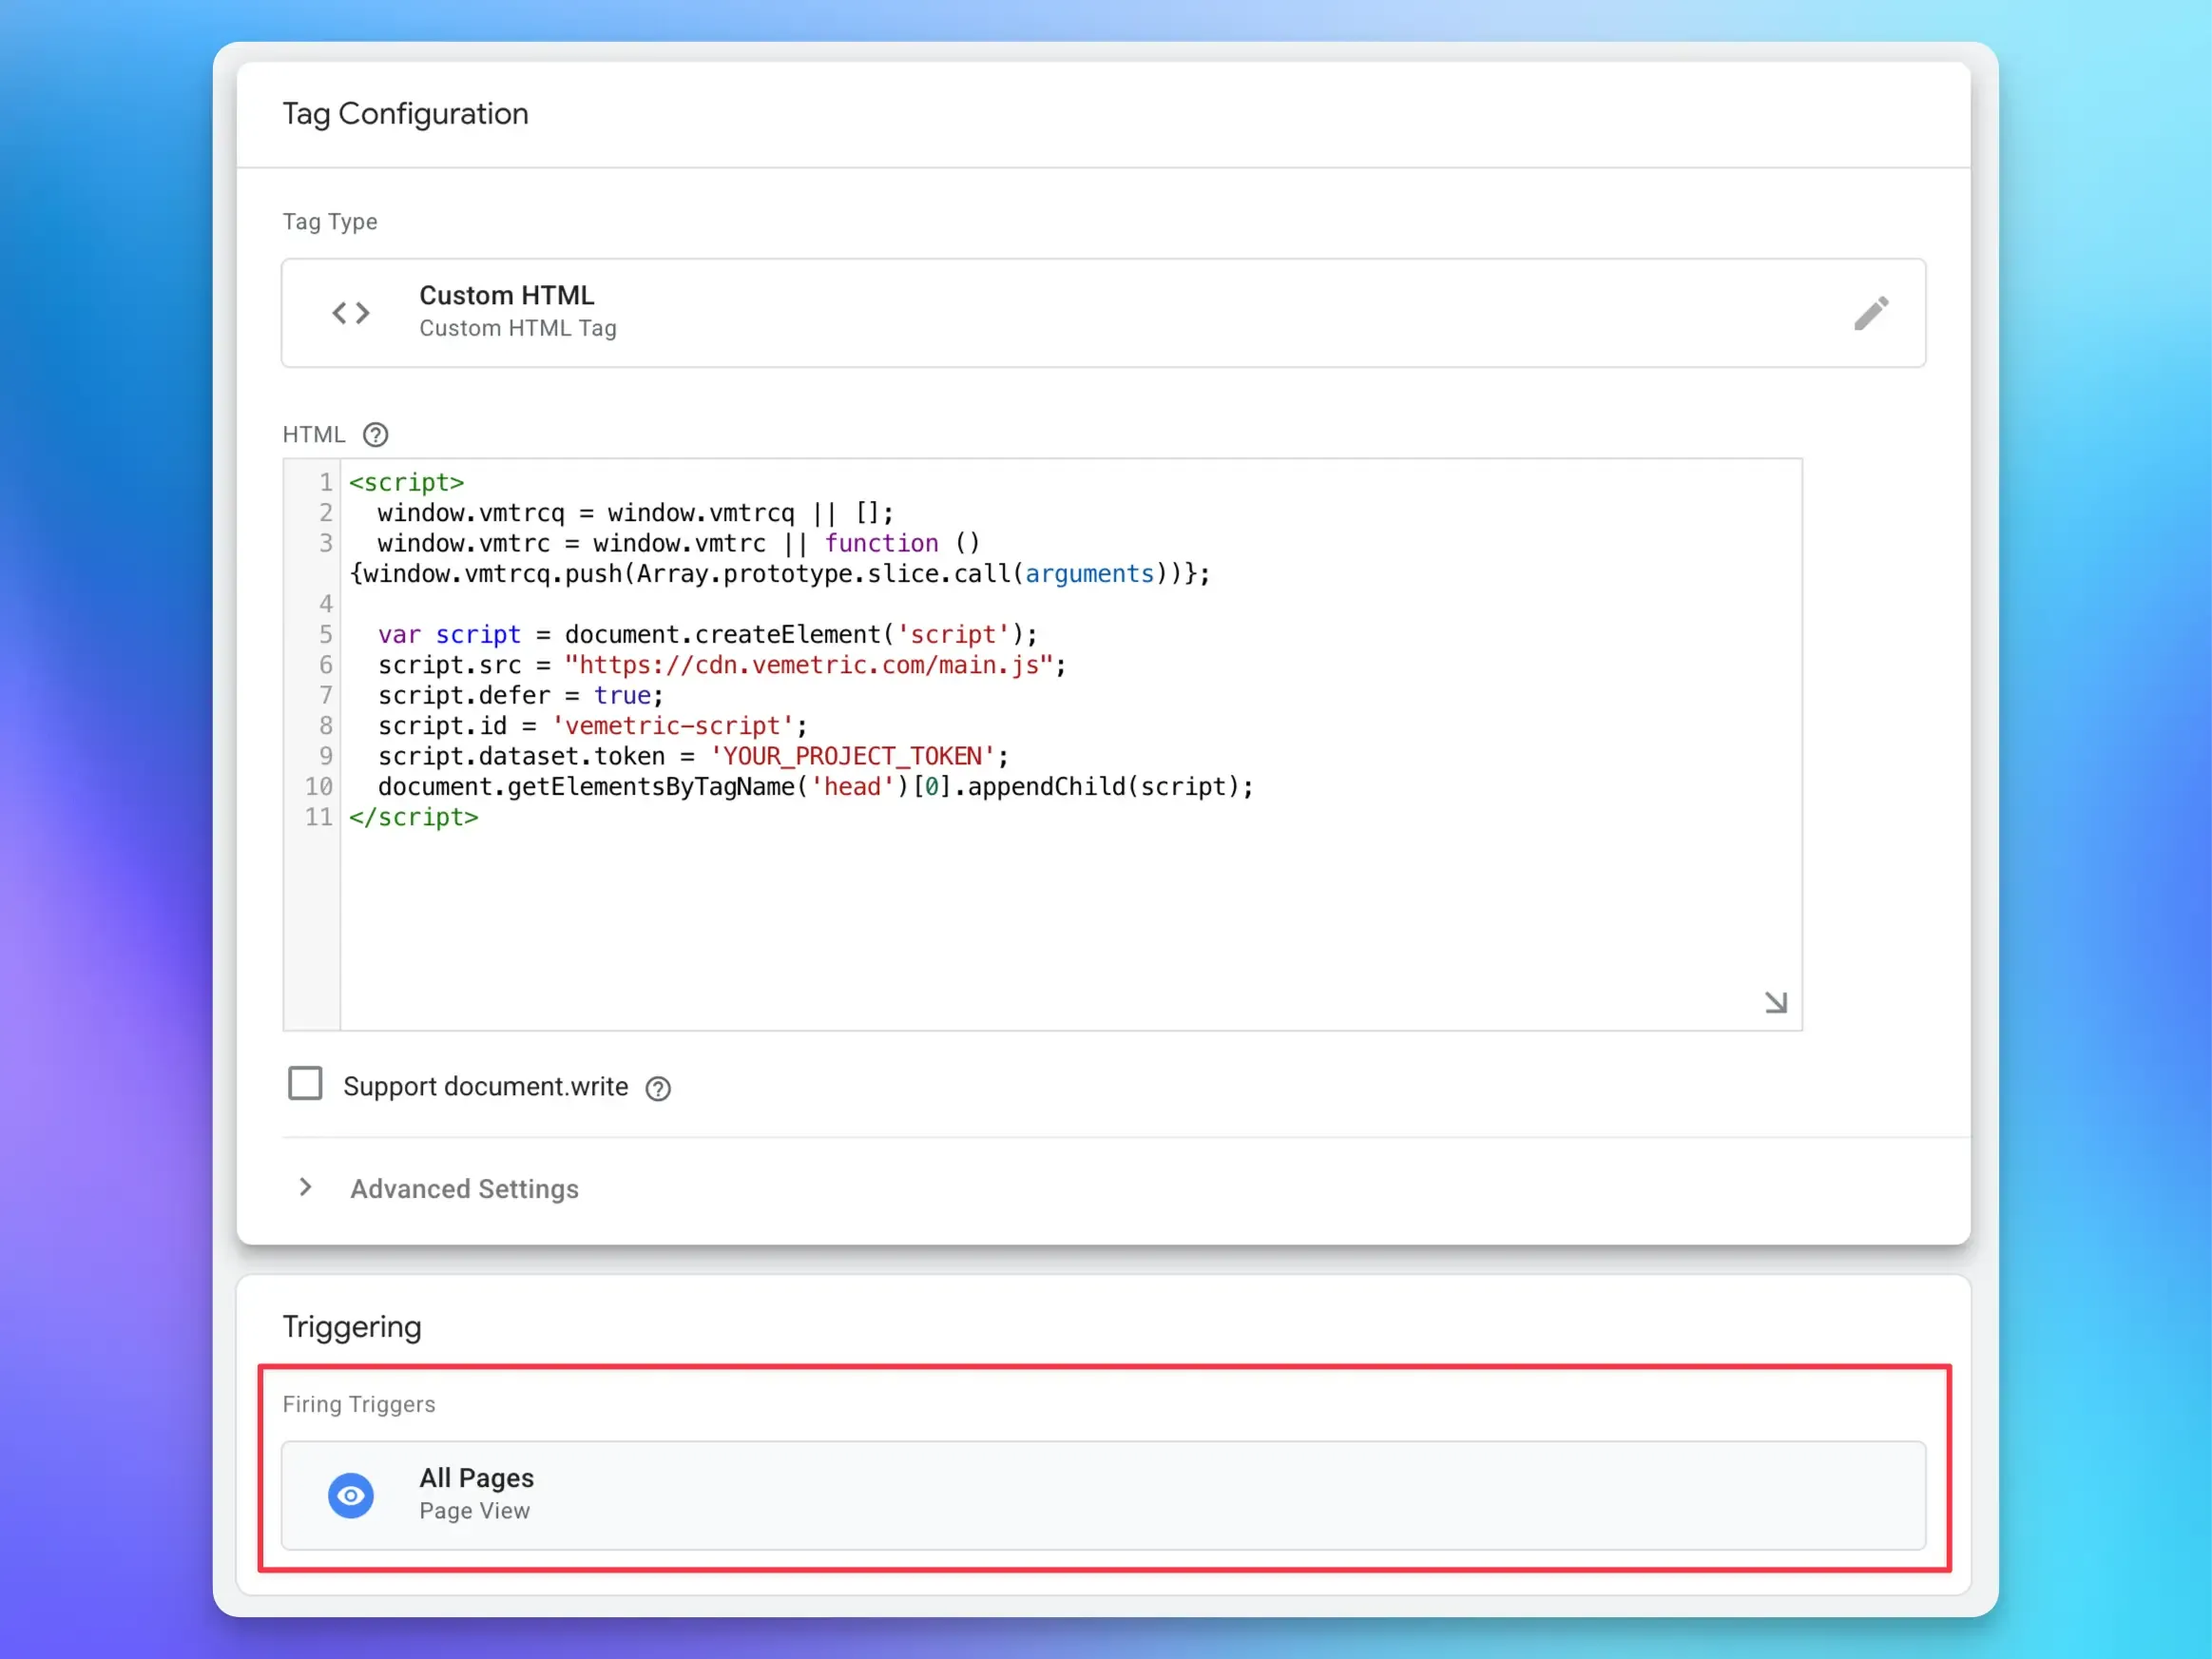
Create a new tag in your Google Tag Manager container and select Custom HTML as the tag type.
Add the code snippet
Paste the following code snippet into the HTML input field:
Replace
YOUR_PROJECT_TOKENwith the unique token for your project (found in the project settings).
Configure triggering
Configure the tag to fire on All Pages.
Verify installation
After saving and publishing your container in Google Tag Manager, Vemetric will automatically start tracking page views on your site (each page load will be recorded). You can verify this by checking your Vemetric dashboard for incoming pageview events a few seconds after loading a page
Data from
localhostwon’t be tracked.
Keep in mind that one project can be used to track data from multiple websites, which can be useful when you for example want to track users across your landing page and web application. We’ve also created a guide on how to track data across subdomains.
Optional: Track custom events and identify logged-in users
You can either track custom events via data attributes on elements, or by interacting with the vemetric object on the window.
You can track custom events by adding data-vmtrc attributes to any HTML element.
Look at the data attributes docs for more information.
You can also track custom events and identify users by calling the trackEvent function on the vemetric object available on the window.
Look at the HTML Script docs for a detailed explanation of the available parameters.
Also learn more about User Identification to track authenticated users and see their full journey.
Get started by integrating Vemetric into your project.
Easily integrate Vemetric into your WordPress website.