Setting up a proxy using Cloudflare
Optimize tracking by proxying data via Cloudflare.
With Cloudflare Workers, you can easily proxy the traffic through your own domain. We’ve prepared the following step-by-step guide to help you set it up.
Setup
Create the Cloudflare Worker
Navigate to the Compute (Workers) > Workers & Pages section in the Cloudflare dashboard and click on Create. Choose the “Hello World” template and deploy it.
If you choose to rename the worker, we recommend avoiding names like
analyticsortracking, as this might lead to Cloudflare taking them down.
Once the worker is created, click on Edit Code and paste the following code.
Add the Worker Route
On your domain’s Dashboard, go to Workers Routes and add a new HTTP Route.
Set the Route to your desired domain including a wildcard path (e.g. hub.yourdomain.com/*) and choose the Worker you created in the previous step.
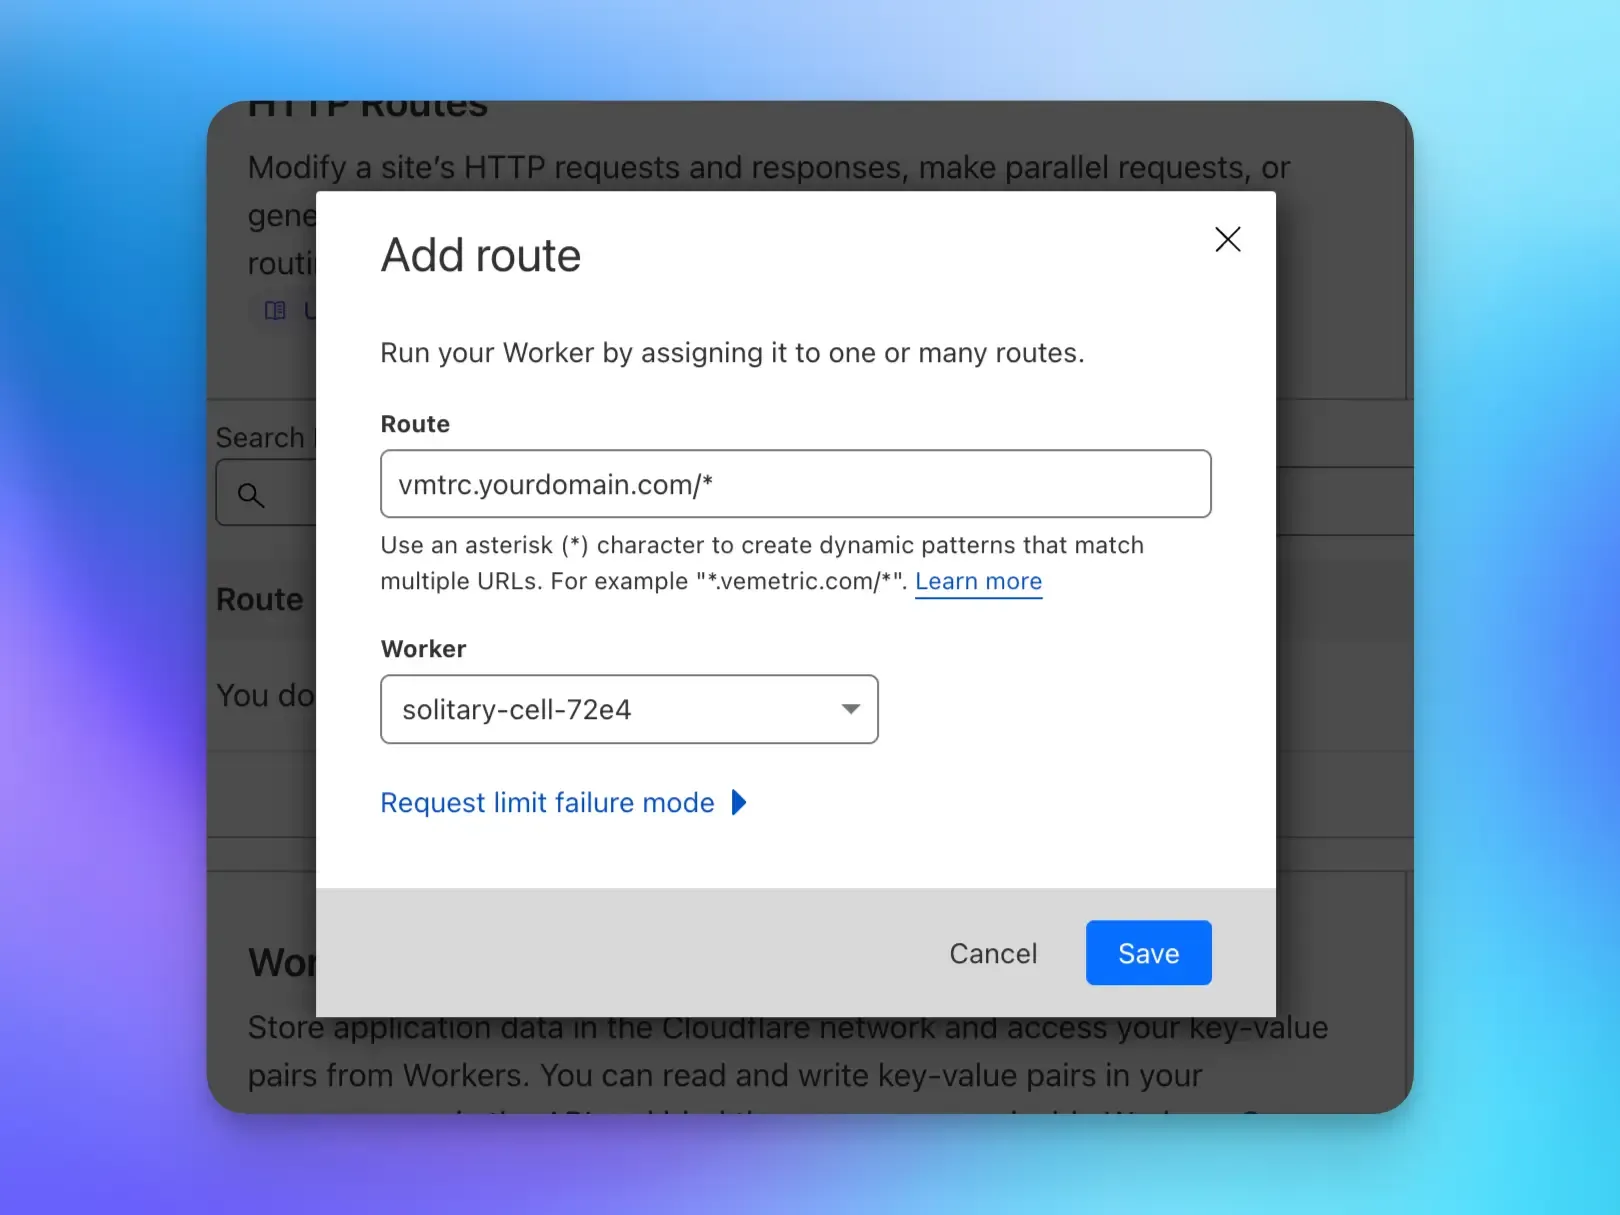
We recommend avoiding names or paths like
analytics.yourdomain.comoryourdomain.com/track, as this might also trigger ad/tracker blockers.Use more generic names like
hub.yourdomain.cominstead.
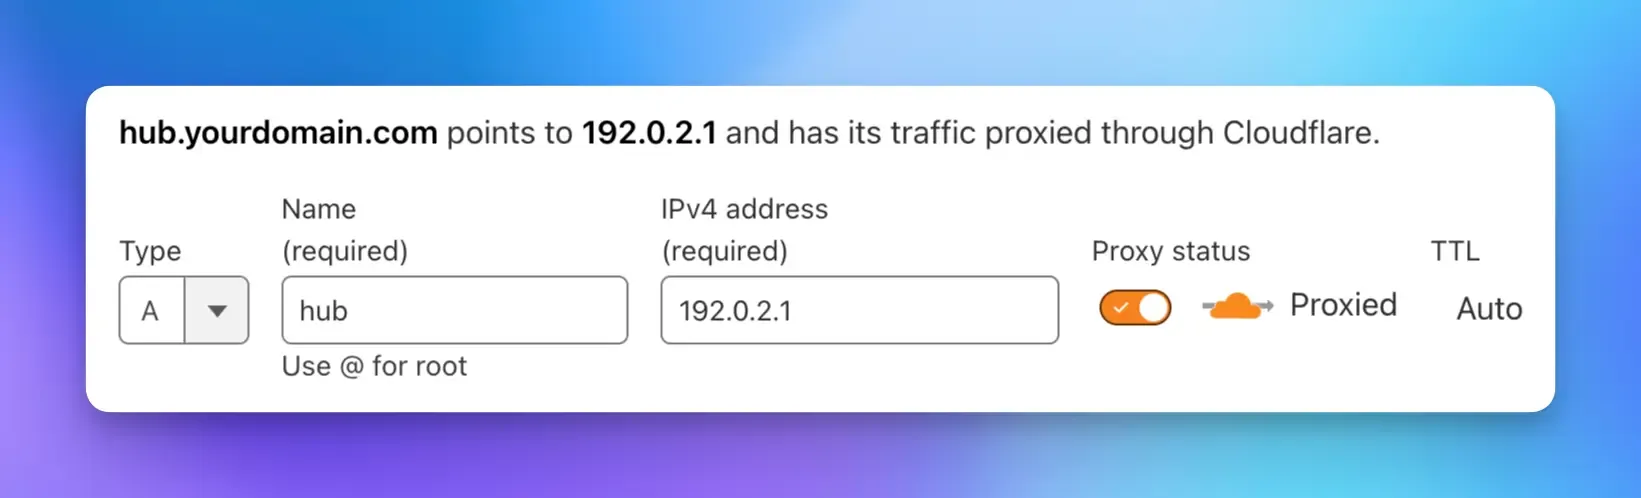
Create the DNS Record
The last step on Cloudflare is to create a DNS record for your proxy domain. It should be a record of Type A and the Name should be your desired subdomain (e.g. hub). Set the Content to 192.0.2.1 and leave the Proxy status as Proxied.
Configure Vemetric
Depending on your setup you need to adjust the Vemetric configuration:
The src attribute of the script tag should now point to https://hub.yourdomain.com/main.js. You also need to pass the data-host attribute with the value of https://hub.yourdomain.com
For the JavaScript SDK, you need to pass the scriptUrl and host options to the init function with the value of your proxy domain.
For the React SDK, you need to pass the scriptUrl and host props to the VemetricScript component with the value of your proxy domain.
For the Astro SDK, you need to pass the scriptUrl and host props to the VemetricScript component with the value of your proxy domain.
Congratulations! You’ve successfully set up a proxy using Cloudflare Workers. Please reach out if you have any questions.
Optimize tracking by proxying data via Nginx.
Overview of the available Vemetric SDKs